メールのパーソナライゼーション
Email personalization allows you to tailor email content to each recipient by using attributes and placeholders. This helps you create more relevant and engaging messages while reaching many customers at once.
プレースホルダー
プレースホルダーを使用して、名前、口座番号、その他のプロフィールデータなどの標準属性とカスタム属性を使用してメールをパーソナライズします。これにより、多くの視聴者に送信する場合でも、各メッセージが受信者に合わせて調整されているように感じられます。 標準属性とカスタム属性は、People プロファイルにリンクされます。属性とその設定方法の詳細については、People を参照してください。
リンクを追加するときに、リンクを特別なリンクとして定義することもできます。
- ブラウザで表示:
{$browserlink} - 購読解除:
{$unsubscribe}
ブラウザで表示 リンクは 5 日後に有効期限が切れます。この機能は、API経由で送信される電子メールトラフィックに対してデフォルトで有効になっていません。有効にするには、Supportまたはアカウントマネージャーにお問い合わせください。
Simple expressions
Simple expressions let you format and manipulate any personalization you add to an email message. The available options depend on the data type of the attribute you insert, ensuring consistent display.
Supported formatting options:
- String: Proper case, lower case, upper case
- Numeric: Round (down if less than X.5, up if greater than or equal to X.5), floor (always round down), format with two decimals
- Date/Time: US format (yyyy-MM-dd or yyyy-MM-dd hh:mm), EU format (dd/MM/yyyy or dd/MM/yyyy hh:mm), day of year, day of week, month of date
Example:
If you insert the firstName attribute, you can format it as:
- Proper case → John
- Lower case → john
- Upper case → JOHN
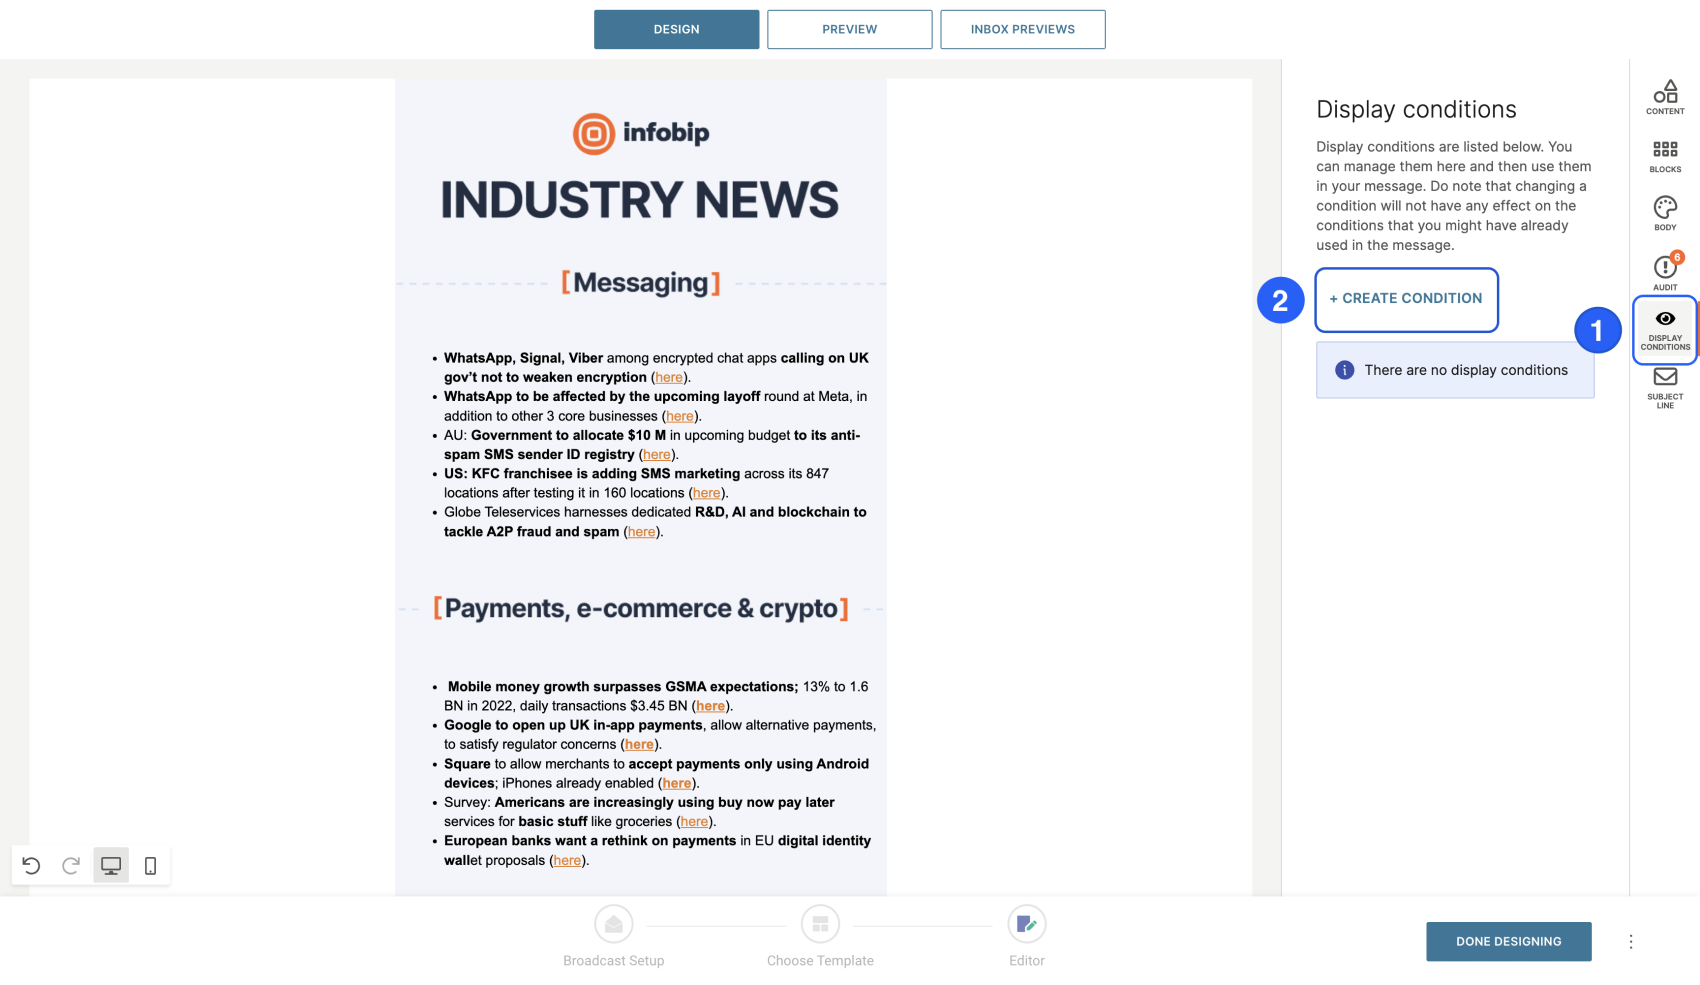
表示条件
表示条件では、メール内のコンテンツを表示または非表示にするためのルールを定義できます。これにより、同じメッセージが視聴者全体に送信された場合でも、各受信者は自分の属性や興味に合わせたコンテンツを見ることができます。メッセージごとに最大 50 個の条件を作成できます。
表示条件の作成方法 [#how-to-create-a-display-condition-display-condition]
表示条件を作成するには:
- メールエディタで、表示条件タブに移動します。
- [条件の作成] を選択します。
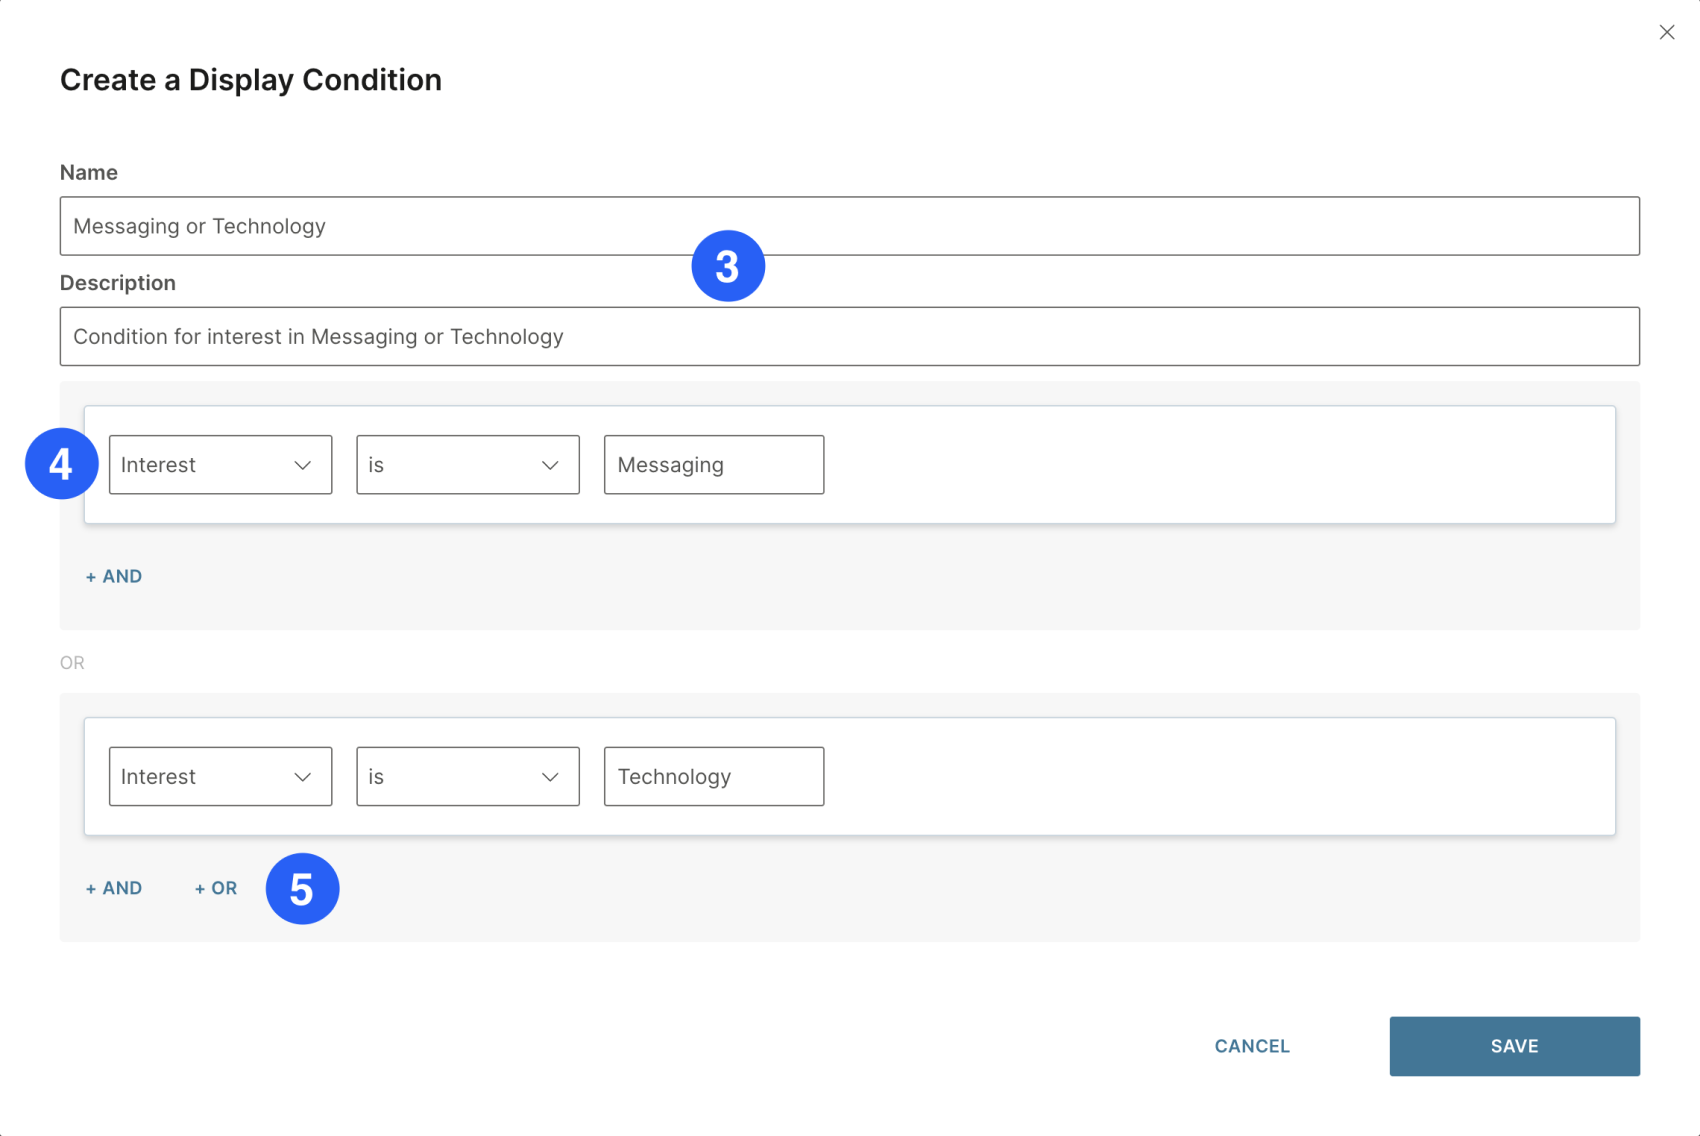
- 名前と説明を入力します。
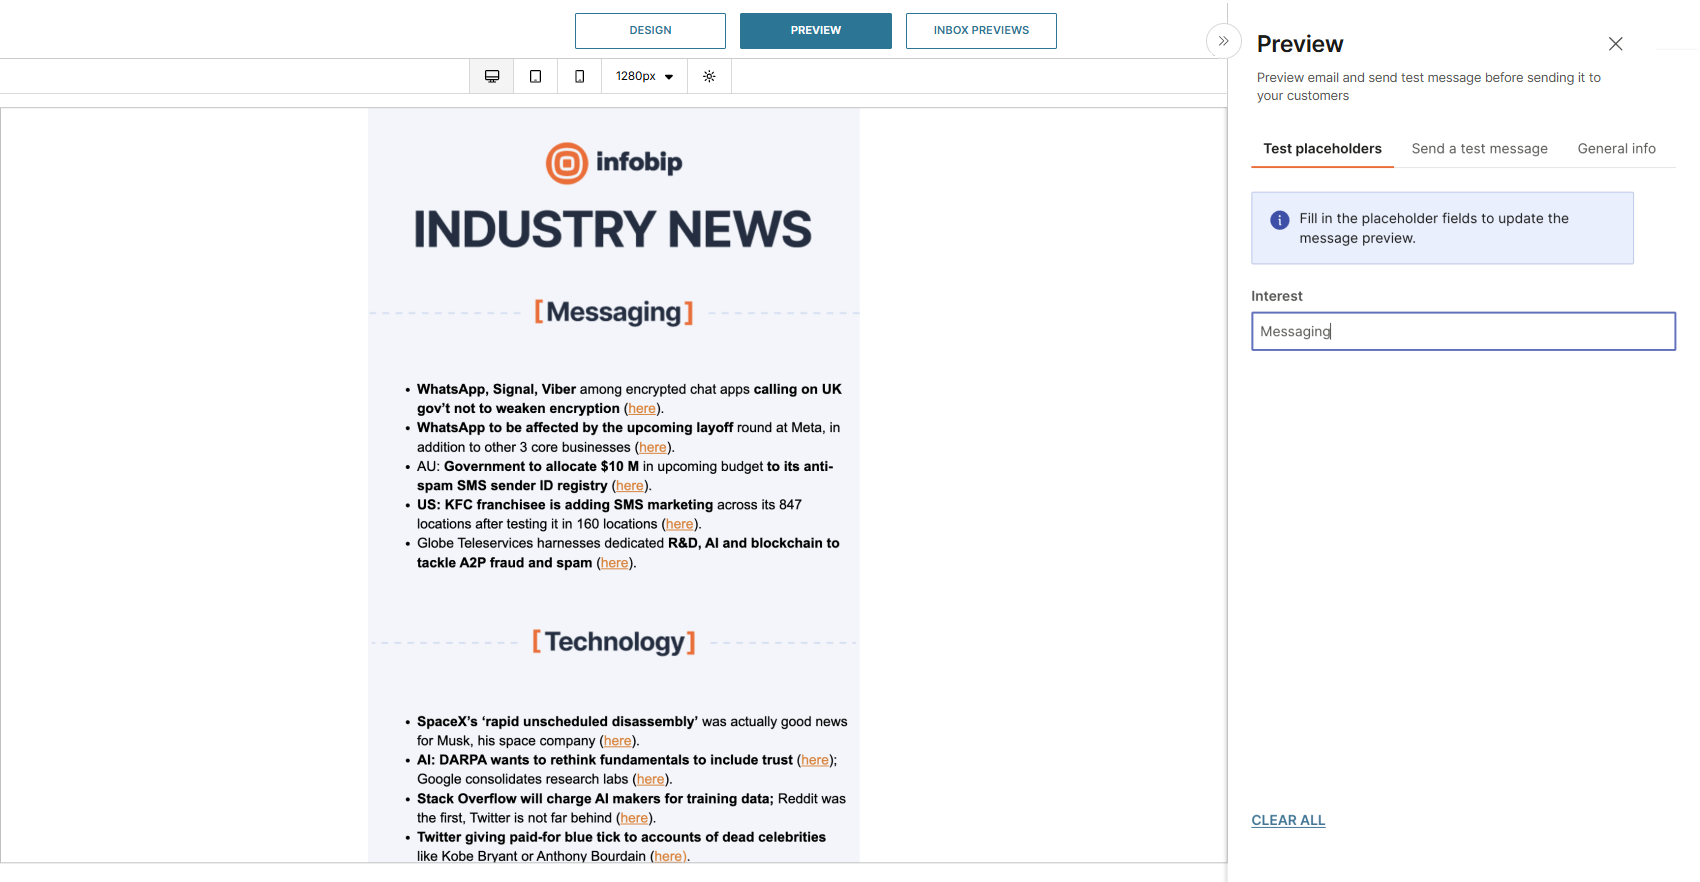
- 属性を選択します(例:インタレスト=メッセージング)。
- より複雑なロジックを作成するには、AND または OR 演算子を使用します (たとえば、Interest = Messaging OR Technology)。
- Save (保存) を選択します。
コンテンツへの条件の割り当て [#assigning-a-condition-to-content-display-condition]
コンテンツに表示条件を割り当てるには:
- メールデザインで、行またはコンテンツブロックを選択します。
- プロパティ パネルで、[表示条件の追加] を選択します。
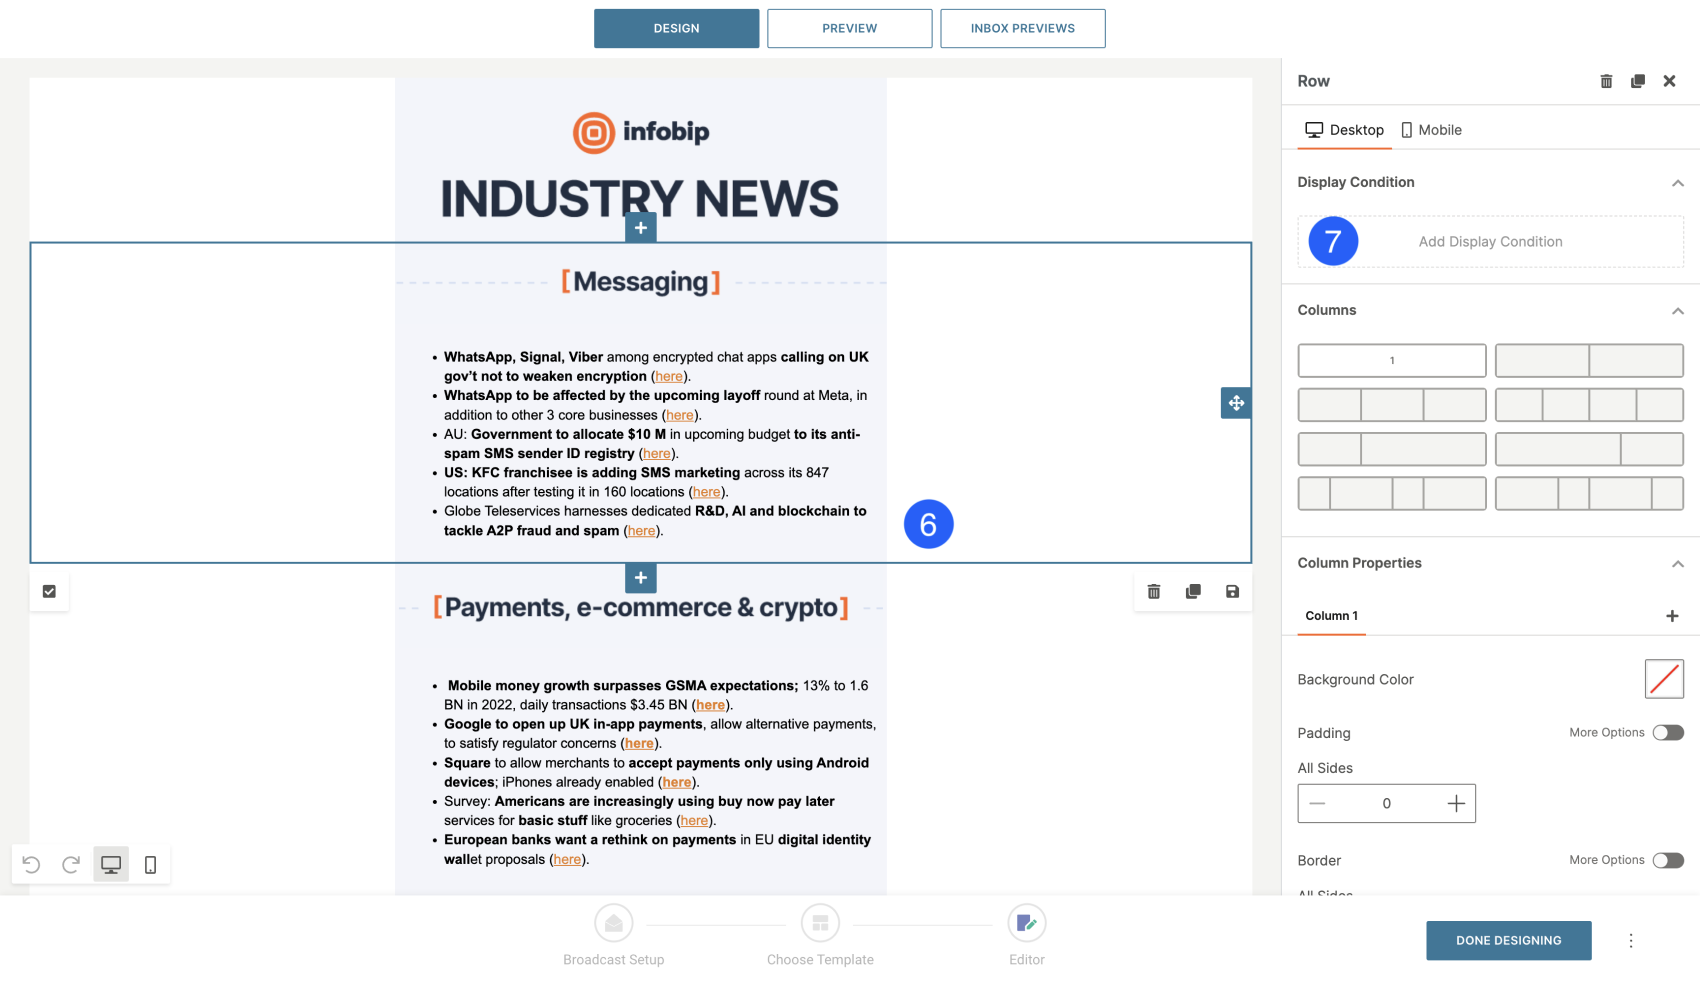
- 適用する条件を選択します。
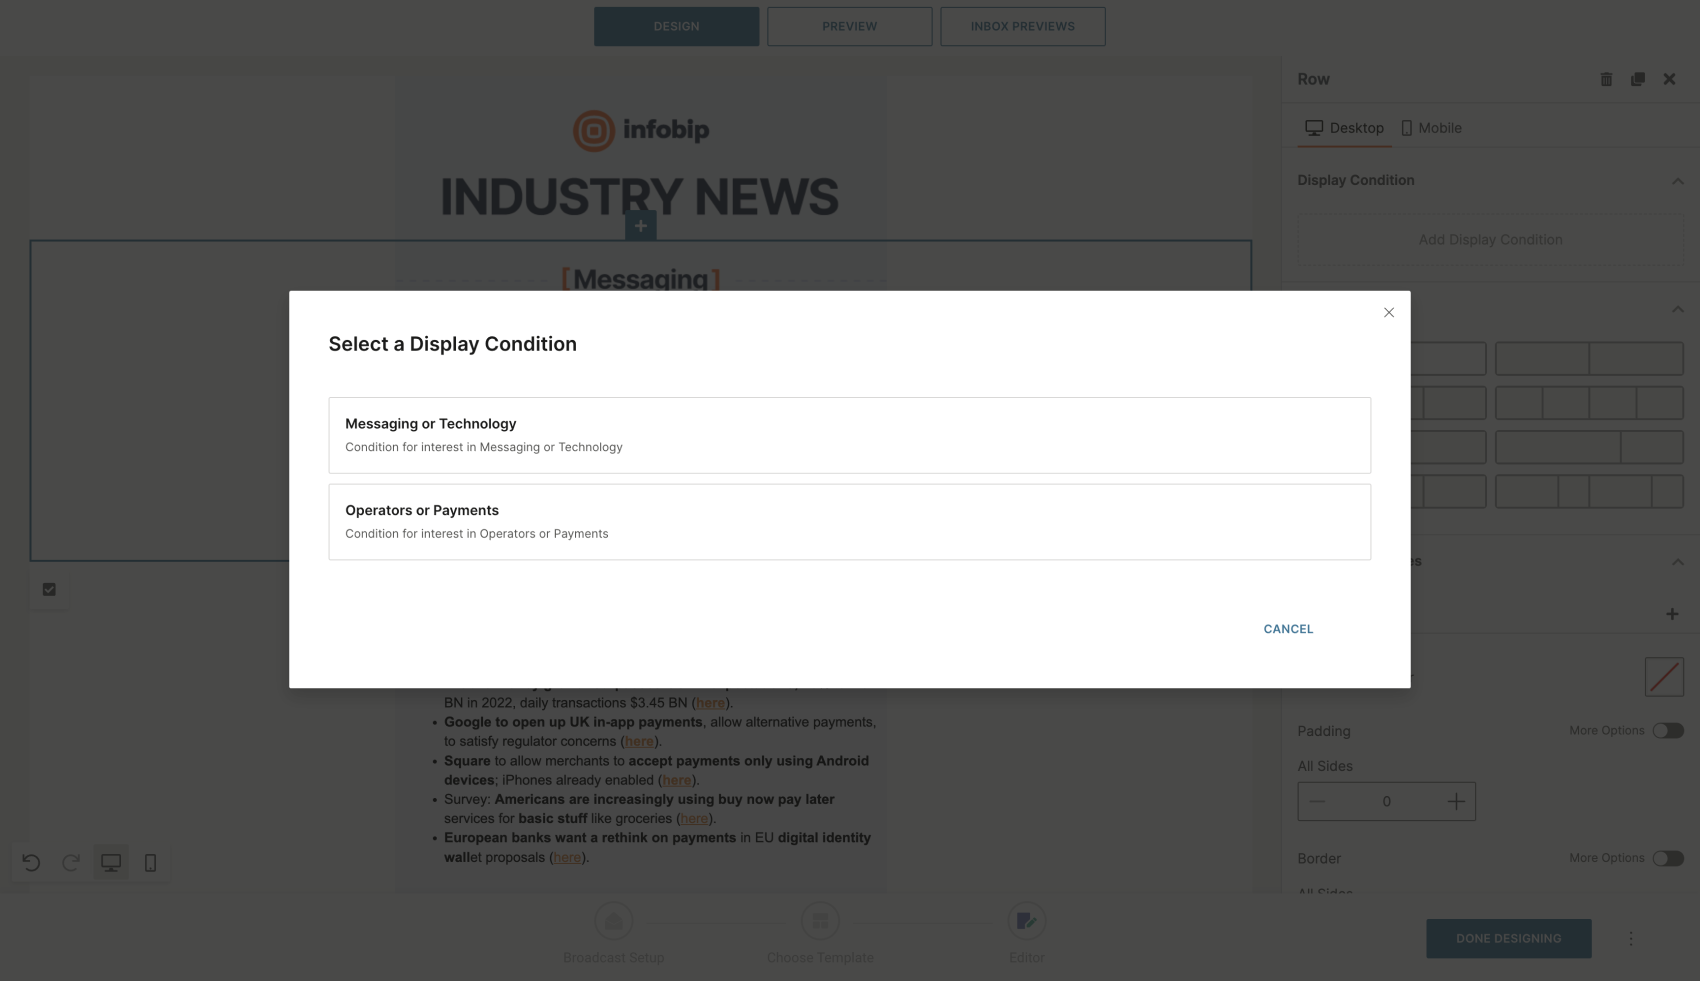
- [プレースホルダーのテスト] タブを使用して、**プレビュー] で条件をテストします。
例:
ニュースレターに複数のトピックが含まれている場合は、表示条件を使用して、受信者の関心に一致するセクション(メッセージやテクノロジーなど)のみを表示できます。
Repeat block
The repeat block feature lets you add personalized lists to your email messages, where items are dynamically loaded for each campaign or recipient. Use repeat blocks to create messages such as:
- Cart abandonment reminders
- Newsletters
- Low stock alerts
- Price drop notifications
- Policy expiration reminders
A repeat block works by looping over a list (array) of data and automatically repeating a section of your template for each entry in that list. Item properties are dynamically inserted into each repeated block.
How to create a repeat block [#how-to-create-a-repeat-block-repeat-block]
To create a repeat block:
- Create a Custom email message or open a template.
- Design the layout for the content you want to display.
- Select the block you want to repeat.
- Select the Placeholder icon.
- In the pop-up window, choose the list of items (from Catalogs or List attributes).
- To refine your list, select Filter to define which items should appear.
- Set the Maximum amount of items to display.
Best practice: Limit repeat blocks to 15 items per message for optimal performance and readability.
Personalization with Catalogs [#personalization-with-catalogs-repeat-block]
If Catalogs are your source of data, you can match items to each recipient to personalize your message:
- Choose the Catalog field you want to match to a People attribute. Only items that match the recipient's attribute are shown in the email.
- Add multiple match rules to tailor the list further. For example, show products from the Catalog that match the recipient's Size and also fall under a Category they are interested in.
- Use the Sort option to control the order in which items are displayed.
- Under the Available placeholders section, review the data you can dynamically insert into your message.
- Select Preview to test how the personalized list appears for each recipient.
テンプレート言語
新しい テンプレート言語 では、動的な電子メール コンテンツに対して、より強力で読みやすく、標準化された構文が導入されています。HTML コンテンツ内でテンプレート言語を使用し、リクエストの to パラメーターでプレースホルダー値を定義します。
新しいプロジェクトに推奨される構文:
- プレースホルダー:
{$placeholder} - 式:
{{ ... }} - ロジックタグ:
{% ... %}
タグ [#tags-template-language]
タグはロジックを作成し、テンプレートのフローを制御します。それらは中括弧とパーセント記号で示されます。
{% タグ %}
条件 [#conditions-template-language]
{% if %}タグを使用して、式が true と評価されるかどうかに基づいてコンテンツを表示します。
すべてのブロックを {% endif %} で閉じます。ロジックは {% elseif %} と {% else %} で拡張できます。
例:
| 入力 | 出力 |
|---|---|
{% if {$firstName} == "Alex" %} ねえアレックス!{% elseif {$firstName} == "アンナ" %}やあ、アンナ!{% それ以外の %}こんにちは、見知らぬ人!{% endif %} | やあ、アンナ! |
演算子 [#operators-template-language]
論理演算子と比較演算子は、if ステートメント内で使用できます。
ループ [#loops-template-language]
{% for %} を使用して、配列やオブジェクトなどのコレクションを反復処理します。limit:nを追加して、反復回数を制限します。すべてのブロックを {% endfor %} で閉じます。
要素のリストを反復処理する
要素のリストを反復処理する
| 入力 | 出力 |
|---|---|
商品をカートに入れたままにした: \{\{ 製品 \}\}\{% endfor %\} | カートに商品を置き忘れた場合: シャツ ジーンズ シューズ |
オブジェクトのリストの反復処理
| 入力 | 出力 |
|---|---|
商品をカートに入れたままにした: \{% endfor %\} | カートに商品を置き忘れた場合: シャツ、10 ユーロ、ジーンズ 2 枚、20 ユーロ、シューズ 1 枚、50 ユーロ、1 |
リスト内のアイテムの位置を計算する [#calculate-the-item-position-in-the-list-template-language]
リストのサイズを計算し、リスト内のアイテムの位置に応じてルールを追加できます。
| 入力 | 出力 |
|---|---|
お客様のポリシー | お客様のポリシー |
エクスプレッション [#expressions-template-language]
expression 関数を使用して、電子メール テンプレート内に式を含めることができます。詳細は、式言語を参照してください。